
Are you looking for a recipe for the perfect bread base? In my opinion, this is the best white bread loaf for open-faced sandwiches I have ever baked. I’ve written it down for you with precise instructions so that you can always handle it with ease.
The result has a soft crumb, a thin crust, and a shape that is easy to slice. Moreover, it is versatile, making it perfect not only for celebrations but also for breakfast or as part of a festive platter.
I even take it with me when visiting family, where a properly garnished loaf always brings joy.
Why you should bake this fluffy loaf
✓ Soft crumb and thin crust, ideal for open-faced sandwiches ✓ Precise measurements and a process that works in a home oven ✓ Versatile pastry: breakfast, snack, or festive platter ✓ Easy to slice into even pieces without crumbling ✓ If you are preparing canapés (bite-sized snacks), use smaller portions of dough for individual mini-loaves

Fluffy white bread loaf for open-faced sandwiches – Recipe
Ingredients
(Makes 2 loaves, approx. 405 g each after baking)
– 260 ml lukewarm water
– 10 g sugar
– 20 g fresh yeast (or 7 g active dry yeast)
– 500 g all-purpose wheat flour
– 9 g salt
– 60 ml milk
– 40 g lard or butter (melted, lukewarm)
For the glaze:
– 1 egg
– 1 tbsp milk
![]()
The fat you choose makes a bigger difference than you might think. Butter provides a wonderful flavor, but the loaf will harden faster. Lard keeps the pastry soft and moist until the next day, which is why I often choose it at home. If you want the softest crumb and extra long-lasting freshness, neutral oil also works great.
Instructions
1. The Starter: Mix the yeast and sugar into a portion of the lukewarm water and let the starter rise. 2. In a stand mixer bowl: Add the flour, salt, remaining water, and milk. Add the starter, mix, and knead until the dough softens and begins to pull away from the sides. Then mix in the melted lard or butter and continue until the dough is smooth and elastic. 3. Shaping the Ball: Form the dough into a ball, place it back in the bowl, cover, and let it rise for approximately 60 to 75 minutes at 22–24°C until it doubles in volume. Once during the rising process, you can "punch down" the dough (pull the dough out several times and fold it tightly over itself) to strengthen the structure.
4. The Risen Dough: Turn the dough out onto a lightly floured surface and divide into two equal parts. Shape them into balls and let them rest under a tea towel for 15 minutes. 5. Rolling and Folding: Roll each ball into a rectangle, roll it up tightly like a jelly roll, seal the seams, and push the sides at the tips inward with your finger. Shape and roll out into a cylinder the length of your baking sheet. Transfer to a sheet lined with parchment paper, seam side down. Cover with a tea towel and let rise again for 30 to 40 minutes until visibly increased in size.

6. Baking Prep: Meanwhile, preheat the oven to 230°C and prepare steam (either a tray with hot water at the bottom or a few sprays from a spray bottle when placing the dough in the oven). 7. In the Oven: Place the loaves in the oven and after 10 minutes, reduce the temperature to 200°C. Bake for another 12 to 15 minutes until golden brown. Total baking time is roughly 22 to 25 minutes depending on your oven.
8. Finishing: After taking them out, brush with a thin layer of butter for a softer crust and let them cool on a wire rack. Alternatively, mist them with water from a spray bottle.

![]()
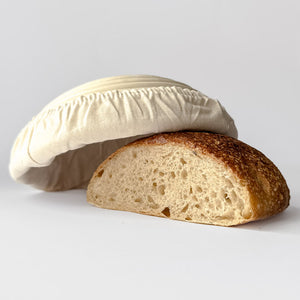
You can tell a well-baked loaf by the way its crust "crackles" after baking. This means the surface has visible tiny fissures and a crisp texture. You can find this same effect on high-quality rolls or buns.
Common mistakes and how to fix them
Loaf cracking at the sides: Shape it more tightly, seal the seams well, and make any scores about 5 to 8 mm deep. Steam in the first few minutes helps controlled expansion.
Tough crust: Shorten the final baking phase by 2 minutes and brush with butter immediately after taking it out. Ensure there is plenty of steam in the oven for the first third of the baking time.
Dense crumb: Next time, add 10 to 20 ml more liquid, knead until elastic, and let it proof until there is a noticeable increase in volume. Remember, every flour is different.
![]()
Choose a medium hydration level (around 64%—a slightly firmer dough), process the dough until smooth, and give it a few extra minutes of kneading after adding the butter or lard. Keep the proofing within a comfortable temperature range and tighten the dough slightly during shaping to ensure your white bread loaf for open-faced sandwiches has its classic form and slices evenly.
Serving & Storage
Once cooled, wrap in a clean tea towel and store in a breadbox. The loaf will remain in good condition for 2 to 3 days; prepare slices for your open-faced sandwiches on the day of serving. If you happen to have leftover slices, they can be briefly toasted in a pan or toaster and then rubbed with garlic and butter. A true delicacy!

Postup
Jak na to krok za krokem
Tipy od Mari
Krásné pečení a ať se po výsledku zapráší.
Mari


Diskuze a hodnocení (2)
@Eliška – Zdravíme Vás, Eliško, moc děkujeme za pochvalu a hlavně jsem moc ráda, že Vám veka chutnala. Ať to peče! Vaše Mari
Vyzkoušeli jsme přes svátky na jednohubky a neskutečně jsme si pochutnali. Asi už nebudu znovu kupovat veky v obchodech… Děkuji za recept. :-)